The Quarantine Struggle Part Two… How to Obtain a Healthy Work/Life Balance when Working from Home in 5 Easy Steps.

Ah, working from home… Many people think this is a luxury until they actually have to do it, like during this “Stay at Home” Order we are currently in. It sounds great, but in reality it can be quite difficult for a number of reasons. Here are a few:

  • Have trouble focusing on work, when you are in your home environment
  • Too many distractions in your house (family, pets, chores to be done, etc.)
  • Lack of Structure – not sure when to start or end your workday. Some days you may find yourself working at 5am while drinking your coffee in your pajamas and other days you may be working at 6pm when your family is asking what’s for dinner and when you’ll be done?

So this is just to name a few, but I am sure there are others, and some have different variables depending on what your “home life” looks like (ie. roommates, kids, neighbors, etc.)

So let’s talk about how we can tackle these obstacles and distractions for work/life balance.

Step One: Do not work in your pajamas. Once in a while it is okay, but honest opinion, this hurts productivity. You’re too relaxed, too unfocused. Get up, get showered and dressed as if you’re going into the office. This gets you into the mindset to work. The mindset to be productive and get shit done.

Step Two: Have a designated work-space. Whether it is at the kitchen table/counter, or if you have a desk or home office, or a quiet corner in your bedroom (not in your bed – again, too relaxed and hurts productivity), set a designated work area where you can set up your computer and paperwork and focus on work.

Step Three: Set time for work. Whether you are working full time or part time from home. Don’t be all willy-nilly and just work a little here and a little there. For example, if you are planning to put in 4 hours of work, set aside the four hours, like 9am-2pm; Or 8am-12pm, or maybe you’re a night shift person and then it’s like 6pm-10pm. Whatever it is, set the time aside for work, and stick to it. (Side note: This step is important because it tells you this is your designated time to be working on work, and will help you focus on the work and not on distractions.)

Step Four: Create a schedule or plan each day. Similar to with your daily checklist from Part One, you will have a plan or check list for your work day. You may not know what you need to complete when you first sit down, but as you go through emails/phone calls, etc. create a list. Write down the tasks you know you need to complete so that you know during that window of designated work time, you are focused on completing those tasks.

Step Five: When work is done, leave your work space. Don’t linger and check emails, or pop on and off to do tasks periodically throughout the day (unless absolutely necessary). Save it for the next day. Enjoy the time you have NOT working whether it’s watching a little TV, listening to music, completing house chores, or projects or helping your kids with homework, or taking a nice walk. Whatever it is, make sure you disconnect from work so there is no “gray area”.

A few important side notes below:

IMPORTANT: Family, kids, roommates, pets… AKA our Living Distractions (As opposed to non-living like chores, tv, snacks, etc.) can still make this difficult. Teaching your living distractions that when you are working you should not be bothered can take a little practice but it is possible! This is why it is important that you have a designated work time and a designated work-space. By creating a routine, it is a lot easier for others to be understanding, respectful and adaptable to your new schedule. Be patient with them, and don’t give up when it feels hopeless or frustrating. Understand that this is new for them too and may be frustrating for them as well. Usually it takes a few days to a week or so for people/pets to understand this is part of your routine and priorities.

Another side note because I know this is the case for some: If you have noisy neighbors and live in an apartment, try to plan your working hours around “quiet times” that will help you be able to focus on work. If that is not possible, maybe consider working on the balcony/porch or possibly going to a quiet place outside. Your work-space does not have to be confined to your home, as long as it is sufficient for you to be able to do your job and do it well, and still practicing social distancing of course.

I hope this information has been helpful! I hope everyone is staying safe and healthy and practicing good habits during the “Stay at Home” Order. Stay tuned for additional tips to keep you on track!

The Quarantine Struggle Part One… 6 Easy Steps to keep your motivation levels up!

Hey Friends, I hope everyone is doing well and is safe and staying healthy. I wanted to reach out regarding some of the struggles I have seen during the “Stay at Home” Order on social media. So let’s talk about it…

Lack of Motivation –

Well what is motivation? Motivation is defined as “The general desire or willingness of someone to do something”.

Where does it come from? Well the simple answer is, your brain. The complex answer is our emotional response to the information our brain is processing/telling us. Studies show that if there is a reward attached to the information, this makes it more desirable and our response is to work harder to complete whatever tasks are necessary to achieve the goal or reward. Different things motivate us based on what our different desires are. Whether you realize it or not though, this science is applicable for big things like personal growth, or setting personal goals and for simpler tasks such as completing household chores or getting dressed in the morning.

Let me give you an example. Let’s say you hate doing the dishes. Can’t stand it. It drives you nuts. You have a tendency to let the dishes pile up in the sink because your emotional response to the dishes is negative. Doing dishes does not motivate you. And then it gets worse, because you let them pile up for days until you have no choice but to do them because you can’t even get to the faucet anymore. So finally you have to do the dishes and every second of it feels miserable because you are focused on all the negative things that come with the task at this point; Things like the fact you have to scrub the old crusty food off the dishes because they sat there for so long. Some of them might be smelly. Your hands might get dry or rough because it took so long to complete the mountain of dish cleaning.

So now let’s look at it from a different perspective. What could motivate you to do the dishes? Well honestly it could be he very same things that make you hate completing the task. Think about it…If you wash them as you go, it doesn’t take nearly as long. The sink is always empty and clean, your hands won’t get as dried out, because they won’t be sitting in the soapy water as long, the food won’t be all crusted on the plates from days of sitting there, there won’t be a funky odor coming off them. So by focusing on the things you will be avoiding by doing them timely, completing the task might become more desirable and make you more motivated to just do the damn dishes.

So now that we have covered an example, let’s look at how Lack of Motivation is effecting people during the “Stay at Home” Order.

So during the “Stay at Home” Order there are a few consistencies that are really causing a lack of motivation across the board… 1) We can’t go anywhere really. The freedom we had to explore, shop, go out to eat, enjoy things like movies and concerts and the beach are just non-existent. 2) We have to practice Social Distancing. We can’t enjoy the company of family and friends, which is especially hard during major holidays like Easter, or for those celebrating birthdays.

Let’s look at it from the negative first just as we did the dish example. If you can’t go anywhere what’s the point in getting up let alone taking a shower and getting dressed? If you can’t see your family or friends what’s the point of taking care of yourself? No one will notice if you’ve been sitting around in your pajamas for four days watching Netflix and eating frozen pizza and ice cream out of the carton, right?

Now ask yourself… “What in the actual heck am I doing to myself!?”

Now is one of the most important times to stay motivated for yourself! So take a deep breath and let’s talk about how you’re going to do this…

Step One: When you wake up in the morning, take a god damn shower and get dressed as if you are going somewhere. Whether its casual clothes, or gym clothes, or work clothes, get your butt up, get showered and get dressed.

Step Two: Make a schedule for yourself. BE ACCOUNTABLE. Make a list of daily tasks that you are going to complete each day. (This can include anything from work (as many are working from home), house projects, cleaning, reading a book, personal growth and development, home workouts, taking a walk, hitting a certain number of steps, etc.) Write out the list, and cross off the tasks as you complete them. This has been shown to boost motivation and productivity.

Step Three: Plan out your meals and snacks!!! Stop hanging out in the kitchen all day, and plan out what your meals and snacks are as you would on a normal day. Another helpful tip here – don’t buy a whole bunch of junk food. Have healthy snacks available. (Side note: If you have a sweet tooth, check out my recipes tab for some healthier baked options that will satisfy your sweet tooth but still be on the healthier side.)

Step Four: Make sure you are drinking enough water! Even mild dehydration can make us tired or think we are hungry when we really are not. Keep track of how much water you’re consuming each day. (Side note: I start my day every morning with at least 8 ounces of water before I have anything else, including my coffee)

Step Five: Make sure you’re getting some exercise. Whether it is home workouts, or walking around the block, you should be doing something to stay active.

Step Six: Be Productive! Fill your time with tasks that you can feel good about. Whether it’s cleaning out your old closet space of clutter, or learning a new skill, or completing a house project, whatever it is be productive with your time! Make sure to have tasks on your schedule that are realistic and achievable.

Side note: If you choose tasks for your daily checklist that take longer than one day, then break it up into smaller pieces for several days. So for example if it’s taking an online class or reading a book, maybe have on your check list 30 min of reading each day. Or if it was cleaning out the basement, maybe break that up into 4 or 6 parts and say like day one complete far right corner, day two complete the far left corner, and so on and so fourth. That way each day you are checking off the completion of whatever portion of the goals you are working towards.

I hope you guys have found this helpful. Stay tuned for my next few posts which will cover topics such as:

  • how to have a work/life balance when you work from home
  • working out from home
  • how to set goals

Arbonne’s 30 Days of Healthy Live Week 2!

Hi Everyone!

I am sorry I am just getting to this week’s post now – I AM still sticking to the diet! This week for meals I made Arbonne’s Oven-Baked Chicken Fajitas. They taste AMAZING! On the diet plan I am able to have these in an Udi’s Gluten Free Wrap, or with Brown Rice. Both ways are delicious. (Image below) I also made a Gluten Free Pasta Salad! The Arbonne Recipe called for a dressing that did not really appeal to me, so I just kind of winged this one. I made a dressing out of lemon juice and olive oil with an array of seasonings (garlic powder, onion powder, salt, pepper, italian seasoning, a little red pepper). I made some pulled chicken on the side to accompany my pasta salad. And lastly I made a Spaghetti Squash and had that with 90/10 Ground Grass Fed Beef and a healthier side pasta sauce and topped with seasonings.

One of the hardest things for me on the meal plan in week one, was I do not think the program had enough protein for my body type and what I am used to consuming. The first few days I was just really tired feeling as my body adapted to the changes of clean eating and no coffee every morning! On day four I decided to increase the protein in the plan while still sticking to the diet requirements. For example: One of the breakfast options is Gluten Free Oats, but there is only 6 grams of protein in these. I would either add a scoop of Arbonne’s Vanilla Protein, or have some egg whites and vegetables with my oatmeal.

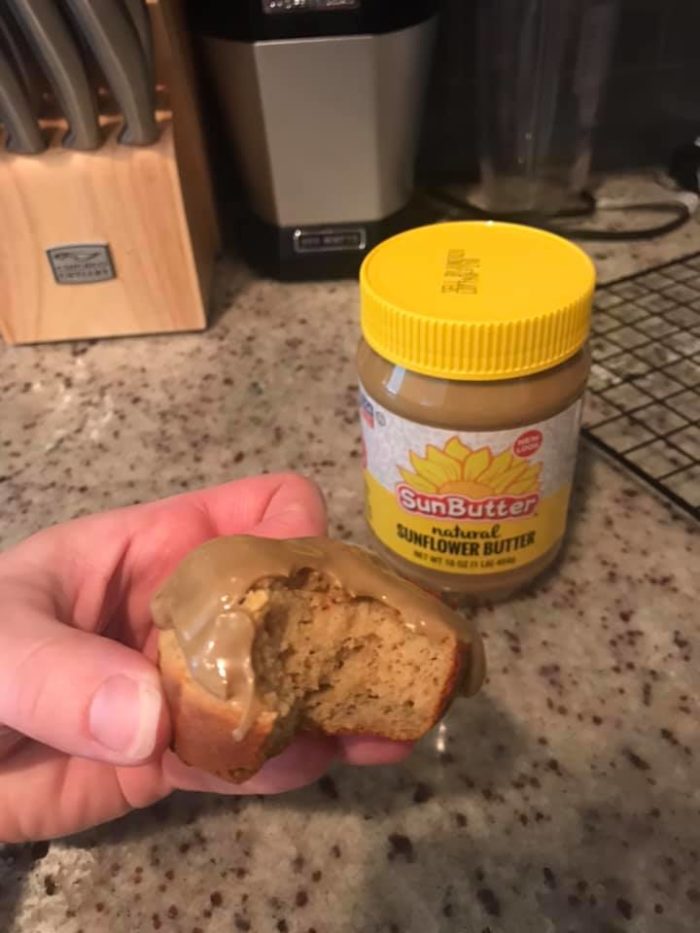
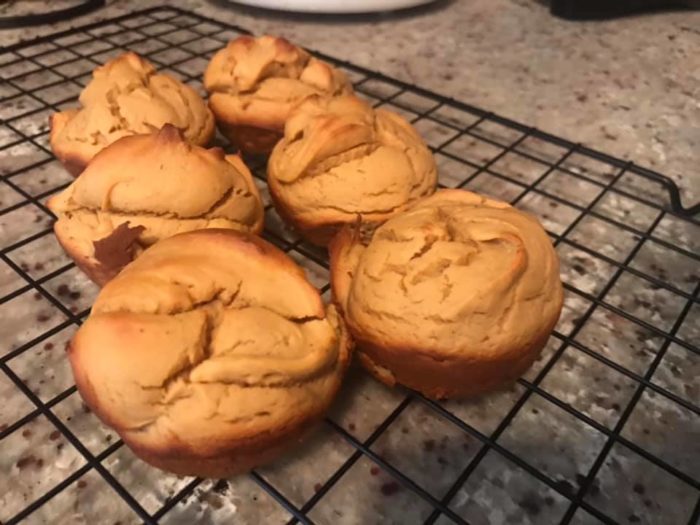
The snack options on this program are amazing! I have had NO sweet cravings which for me (someone who eats cake and ice cream a few times a week, (my own healthier recipes of cake of course) is pretty surprising!) I have made the Arbonne Cupcakes several times in both Vanilla and Chocolate, I have also made the Chocolate Coconut Ice Cream Bars. And in a pinch of on the go, Arbonne’s Protein Bars are awesome! I had purchased a box of the Iced Lemon Flavor and I am down to one left 🙁 I have a box of the Lemon and a box of the Chocolate on my next order! A picture of the vanilla cupcakes which I topped with Sun Butter is below:

Ok, I guess that’s kind of my recap for week two! I am feeling good and proud of myself for sticking to this. Honestly this program is a great diet reset for anyone! Like I said, you can customize it as needed obviously, but it gives you all the tools and support to be successful! AND unlike a lot of other diet plans, this is something you can carry out into the future beyond the 30 days! It teaches you better eating habits and helps you to develop a better relationship with food.

Please feel free to message me if you’re interested in this program! SO many people have had remarkable success with the 30 Days of Healthy Living and Beyond. And you could too!

Arbonne 30 Days of Healthy Living; Meal Prep Week One

The first week is always the hardest. Learning the foods, and the recipes, learning what works and fits your schedule. I decided to pick three recipes from the meal plans for my first week on the program.

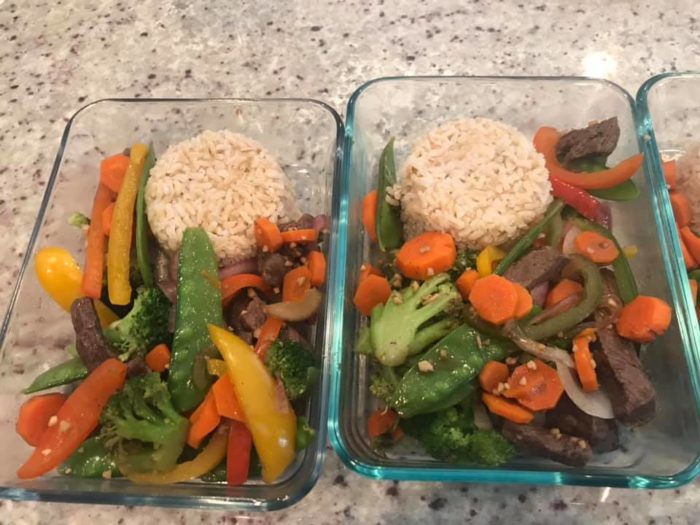
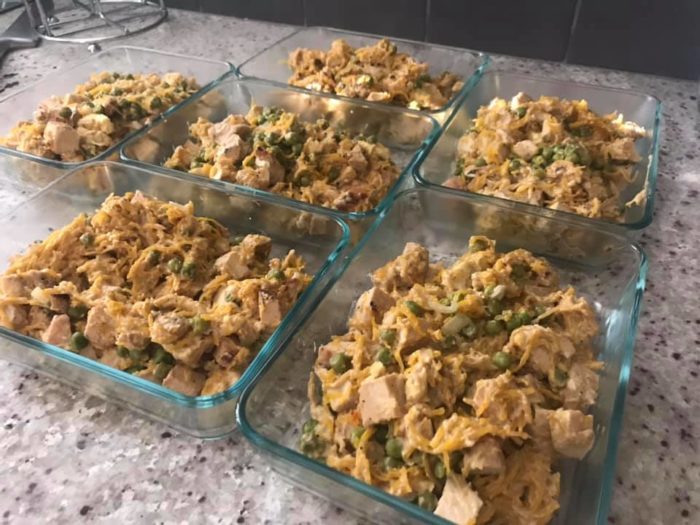
I chose Gluten Free Chicken Pad Thai, Beef & Vegetable Stir Fry over Brown Rice & Chicken & Rice Soup. This made a ton of food. I got 6 servings out of the Chicken Pad Thai, 5 Servings out of my Beef & Vegetable Stir Fry, and probably 6-8 Servings out of the soup. Needless to say, I froze the soup for now. I figured this is a great backup to have in case I get sick of the two meals I prepared and want something different. It will also come in handy if I run out of meals before getting to start my meal prep for next week. I can pop some soup out of the freezer and have that while I grocery shop and meal prep for Week Two.

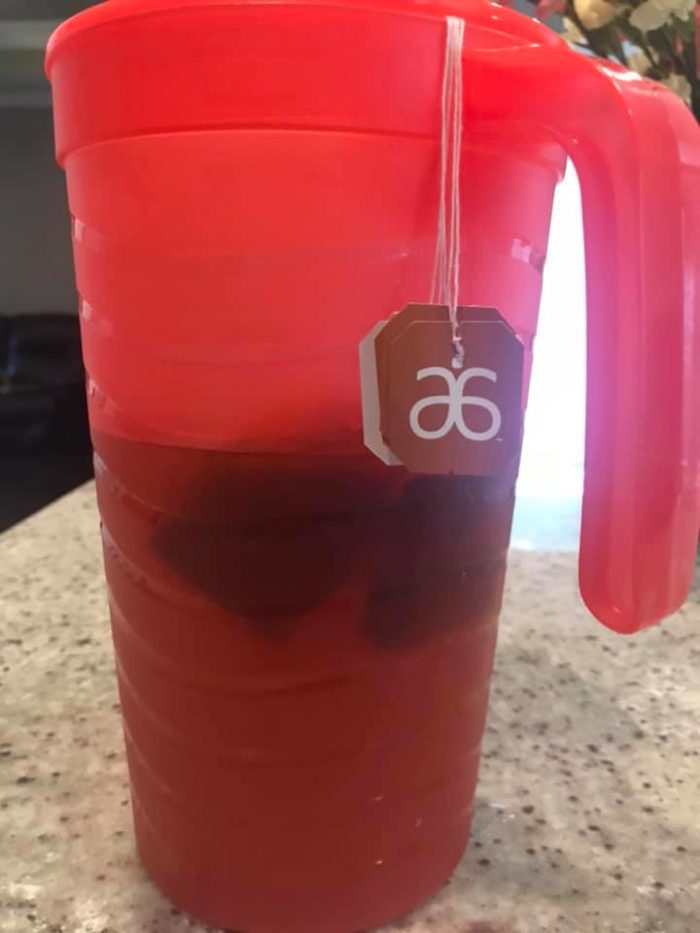
I cut up extra fruits and vegetables for shakes and snacks. I prepared my Arbonne Detox Tea as an Iced Tea so that will last me several days. I prepared Cucumber & Lemon Infused Water. AND I made a list of my meals and snacks for each day this week and hung it on my fridge so I see it constantly!

I posted a couple pictures below, but if you would like to see more about this meal prep, feel free to check out my Instagram (RPTrainer425) or my Facebook Page (RP Trainer).

Looking forward to this program, and feeling like I have a strong start just by being prepared! 🙂

Beef & Vegetable Stir Fry with Brown Rice
GF Chicken Pad Thai
Arbonne Detox Tea (Iced)

Arbonne’s 30 Days of Healthy Living

So tomorrow marks the start of the August 30 Days of Healthy Living. For those of you that are unfamiliar with this program, this is a 30 day diet reset or cleanse. I don’t like to use the word “cleanse” because it’s often misleading. This is not a starvation diet. This is an opportunity to remove foods from your body that cause inflammation, irritation, bloat, stress, sleep issues, etc. The program provides members with a customized stack of supplements for the 30 days, along with 4 weeks of menus/recipes, 4 weeks of vegan menus/recipes, light menus/recipes, bonus menus/recipes, snack menus, grocery lists, a Facebook accountability group and so much more! Not to mention new friendships and the opportunity to better yourself while being surrounded by POSITIVE PEOPLE sharing SIMILAR GOALS!

I decided to do the 30 Days of Healthy Living this month for a few reasons. Number one, I love Arbonne Supplements and use them already (but possibly not to the fullest of their abilities; ie. if my diet were cleaner I may have even better results). Number Two, I tend to fall off track towards mid to late summer. I spend the spring and early summer staying healthy and in shape, but eventually even I like to enjoy the lazy days of beach bumming and BBQ’s. By doing this challenge in August, I am setting myself to not fall too far off track as Summer starts to wind down and Fall approaches.

Over the next 30 Days I will be trying to share my progress, meal prep, how I am feeling, etc. on my page. I know many people are unaware of the benefits of this program and so I am here to share Arbonne with you! I am here to show you how and why this program works! I am here to present you with the opportunity to try Arbonne for yourself!

Please note: I will also be sharing on my Facebook Page (RP Trainer) and on my Instagram Page (RPTrainer425).

I want to thank you guys for following along on my journey! Wish me luck! 🙂

Keto Pancakes

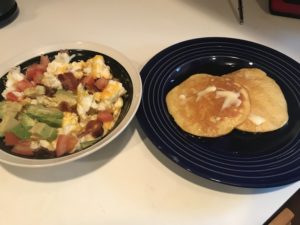
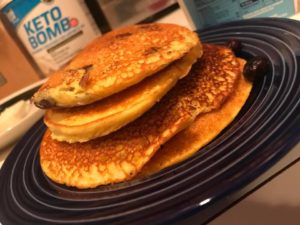
Hey everyone! So some of you saw my keto pancakes on my instagram this morning and asked for the recipe! These were SUPER easy and quick to make. This recipe I designed for just two servings of two pancakes each (4 pancakes total) but obviously you can double or triple the recipe if needed! Keep in mind that if you are low carb/high protein you can use a protein powder instead of the keto bomb and swap out whole eggs for just the white to reducd both calories and fat, and up the protein. I hope you enjoy the recipe! 💪🙂

Ingredients

2 large eggs

2 Tbsp coconut flour

1/4 Tsp baking powder

1/8 tsp salt

1/4 cup unsweetened vanilla almond milk

1 tsp vanilla extract

1/4 scoop BPI Keto Bomb Creamer

Not sure if you can read the macros because I am uploading this from my phone: per serving is 117 calories, 7.1g fat, 5.4g carbs (2.8g net carbs due to 2.6g of fiber), and 7.4g of protein.

Like I said, you can easily alter the recipe to be higher in protein and lower in fat if you’re on a different diet. This was designed for Keto originally but can easily be modified! Enjoy!


Stuffed Peppers – Both Low Carb & Keto Friendly

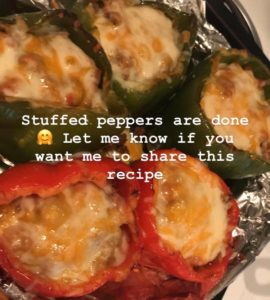
Hi Everyone!  Some of you had reached out and requested this recipe after watching my Instagram Story (RPTrainer425 for those of you looking to tune in).  So Here it is…

Ingredients:

1 lb. of Ground Beef, Turkey, Chicken or Bison  (Note:  I used 80% Ground Beef in my peppers because I am on a ketogenic diet – high fat, low carb, moderate protein.  If you are on a high protein, moderate carb/fat diet, you may want to choose a leaner meat such as Chicken, Bison or Turkey, or even a leaner ground beef.  All of these work, but it really just depends on your diet.)

1 – 14.5oz. Can of diced tomatoes (Note:  The ones I used in my Insta-story were Diced Tomatoes with Jalapeno and Habanero these are spicy/hot peppers.  You could do a plain diced tomatoes, or diced tomatoes with green chiles also work well and are more mild.)

1 Small can of diced chiles  (Optional)

1/2 Small Yellow Onion – Chopped (Optional)

Seasoning of Choice (Not: I used Garlic Powder, Onion Powder, Ground Cumin, Ground Cayenne Pepper, Ground Chili Powder, Salt & Pepper.  Lazy route?… Use a packet of Taco Seasoning)

Shredded Cheese of Choice (Optional) – (Note: I used shredded cheddar and a little shredded Mozzarella on top.)

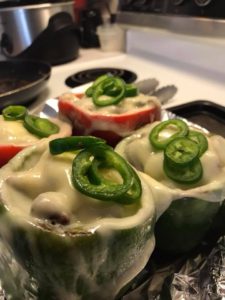
4-5 Good sized, round-ish peppers.  (If doing standing up peppers like shown in the image, they need to have a fairly flat bottom to balance upright in the oven.  If cutting into halves prior to cooking- it doesn’t matter so much.)

Directions:

Step One:  Brown the ground meat in a frying pan.  (Note: You do not need to add cooking spray or oil if you are using a high fat meat like I did.  Lower fat meats will require a little oil in the pan to keep it moist and prevent sticking.

Step Two:  Chop the onion while the ground beef is cooking- You can add your onion cooked or raw to this dish.  If you prefer it cooked, saute the onion in a small frying pan while the ground beef is cooking or zap in the microwave for a minute.

Step Three: Once the ground beef is cooked, add the can of diced tomatoes, the chopped onion if you are using it, and the green chiles if you are using them.

Step Four: Stir ingredients together in the frying pan until well combined, and simmer for 3 minutes or so.

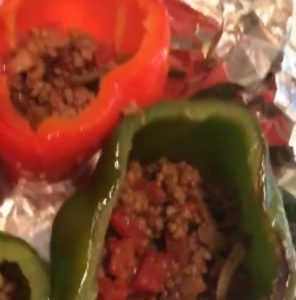
Mind the photo, it’s a screen shot from a video

Step Five: Turn the oven on to 425 degrees -Bake setting.  Rack should be second to lowest probably in the oven.  Or one below the middle.  If that makes more sense.

Step Six:  Add the seasonings of your choice to the Meat mixture and simmer for another 3-5 minutes on low, stirring occasionally to really bring all of the flavors together.

Step Seven:  Turn off the meat mixture, and leave on stove for now.

Step Eight:  Wash and cut 4-5 Peppers (Note:  Either cut the tops off and hollow them out, or cut them in halves and hollow them out.)

Another option for this recipe, cut into halves

Step Nine:  Line a baking sheet with foil and place the peppers open side down on the foil- spray lightly with cooking spray.

Step Ten:  Place in over- for 8-10 minutes.

Step Eleven:  Carefully flip and transfer the peppers to a pie dish or square/rectangular baking pan- (Note: I just transferred the foil with the peppers on it then flipped them to re-use the same foil and make for easy clean up.  A pie plate is easier for upright/standing peppers if you chose the hollow out method.  A baking pan that is square or rectangular is fine for open-faced pepper halves, not too deep on the pans which ever you choose.  Also- Be CAREFUL flipping the peppers, they are upside down and most likely full of hot steam underneath use a fork or tongs to flip- NOT your hands.)

Step Twelve:  Transfer meat mixture into the peppers (Note: I did upright, hollowed out peppers as shown in the photo here… I filled them about halfway with meat mixture, then sprinkled about an 1/8 a cup of cheese, then filled them the rest of the way with meat mixture, then another 1/8 cup of cheese.  You don’t need to use cheese if you don’t want to- and you don’t have to do it this way- completely up to you on this step.)

Sorry these photos are a little grainy they are a screen shot from a video, because I didn’t think to take pics during the process.  My bad 🙂

Step Thirteen:  Place Stuffed Peppers in the oven- cook for another 8-10 minutes or until cheese is melted but not burnt of course.  🙂

Step Fourteen: Remove from oven and turn the oven off.

Serve warm or let cool and package for an easy meal prep 🙂

Note:  You can serve these with a little plain greek yogurt or sour cream if you liked them spicy and want to balance them out.

Enjoy! 🙂  Follow me at RPTrainer425 for more recipes.

#easymealprep #mealprep #easyhomerecipes #healthyandfit #Ilovefood #happiness

Best Keto Bread Recipe I have found yet!


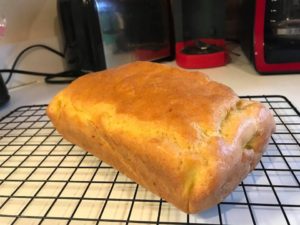
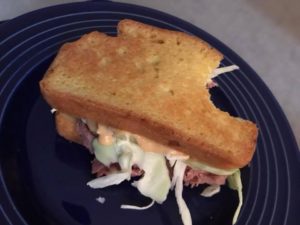
So being on a Ketogenic diet can be annoying at times.  Main reason, carbs are so much of the foods we enjoy!  I have been experimenting with some recipes of my own, but have not had the courage to try to create a bread recipe of my own yet.  And here is the main reason why… When I think of baking a loaf of bread I picture kneading dough for 45 minutes then letting it rise, and maybe several hours later I get a lousy loaf of bread.  (I know, a slight exaggeration, and yes I am aware there are bread machines now, lol but seriously…)  So I started googling keto bread recipes and found one that looked legit.  I mean… I wanted a sandwich!  Not a breakfast or pastry style bread.  I wanted a bread I could grill or toast, toss a stack of meat and cheese on it and call it lunch! Haha.  So I made the recipe, and the bread turned out great, so I wanted to share it here with fellow health and fitness peeps.

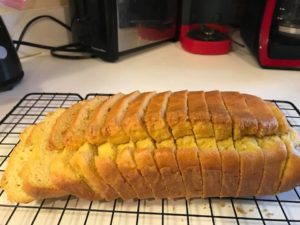
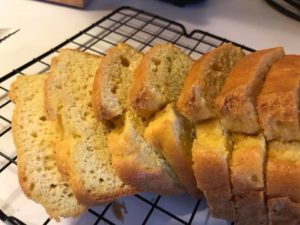
This beautiful loaf of bread was super easy to make, it did not take a lot of time, and makes a damn good sandwich.  So below you will find the link for the website for this amazing bread recipe, I felt I needed to share, and of course a bunch of pictures to show you the texture of the bread.  Not crumbly as many almond flour based breads can turn out.  And not cake-like, as many coconut flour based breads turn out.  Of course it is a little more dense than a typical, all purpose flour white bread, but it is delicious.  This recipe is a good one.

Here is the link for the bread recipe: https://www.fatforweightloss.com.au/recipe/keto-bread/

Below are some additional photos of this delicious loaf up close so you can see the texture of it.

Like I said… Makes a great sandwich 😉

Try it toasted with peanut butter and jelly… Another favorite.

Steak & Cheese Stuffed Peppers

Good Morning!

One of my favorite staples in meal prep that is SUPER easy is Stuffed Peppers.  I have always done these with ground beef or ground turkey, some veggies, seasoning, and cheese.  Sometimes I’d add in some rice.  But, recently I was introduced to a new website for recipes that I fell in love with.  One of the recipes on the site is Steak and Cheese stuffed peppers, and I thought to myself, “A- this sounds amazing, and B-Why have I never made these before!?” lol. So naturally I want to share it with everyone…

This recipe is from the website: https://fitmencook.com/

It’s delicious, keto and low-carb friendly, and super easy to make!

]  

Here is the full link for this amazing recipe and some others: https://fitmencook.com/keto-meal-plan/

Enjoy! 🙂

Macro Friendly Sweet Breakfast Cakes!

Welp folks, it’s the 13th of March and we are snowed in!  Snow days make me want to snuggle up on the couch in my sweats and watch movies, so that is exactly how I started my day today!  But it isn’t complete without a hearty breakfast.  We had our eggs, but to accompany them I threw together this quick recipe for Macro Friendly Sweet Cakes (Pancakes)!  Took about ten minutes to make… Check it out!

Ingredients

1/4 Cup + 1 Tbsp Coconut Flour

1 Tsp Baking Powder

1/4 Tsp Salt

2 Large Eggs

1 Scoop Gold Standard Vanilla Whey Protein

1 Tsp Vanilla Extract

1/4 Cup Almond Milk

1/4 Cup Water

Optional Ingredients Below:

1/4 Cup Blueberries (Fresh or Frozen, I used frozen here)

1 Tbsp Cream Cheese

1 Tbsp Strawberry Jam

Dollop of Whip Cream (I use Reddi Whip cause that shit is the bomb)

Directions:

Combine all of the required ingredients (Everything above the optional items).  Mix thoroughly so batter is smooth.  Heat up a skillet and spray with cooking spray.  Scoop your batter onto the pan as you normally would for pancakes.  When the pancakes start to rise and develop little bubbles, toss in some of the blueberries before flipping the pancake.  Now, of Course you can add these into the batter if you prefer to do so, but this is the way I prefer to do it for a few reasons… One- it prevents the batter from turning blue!  Two- It prevents the batter from separating around the blueberries (which sometimes distorts the shape of pancakes and can cause uneven cooking).

One the pancakes are done… If you choose to add the optional ingredients as I did… You can zap the cream cheese in the microwave for 10-15 seconds.  Don’t cook it, just warm it so it doesn’t make your pancakes cold.  Same thing with your Jam.  If the jam is in the fridge, give it just enough heat to prevent it from making your pancakes cold.  I spread the cream cheese and strawberry Jam between two pancakes, then topped with a little whip cream.  And that’s it!

You can enjoy these without the fruit and jam and cream cheese- substitute a little cinnamon for the blueberries, or enjoy with just maple syrup.  Or even try other fruit… Banana Pancakes are the bomb if they can fit your macros, and are even better with cinnamon and walnuts…. Strawberry banana are a great combo as well!

Macros (without Jam & Cream Cheese, but including Blueberries):  Makes 3 Servings – 150 Calories per serving, 5.4g fat, 10.2g Carbs, 4.5g Fiber, 14g Protein.

Anyways, hope everyone has a great snow day!

Over and Out… – RPTrainer 🙂